มาทำความรู้จักคำศัพท์ และขั้นตอนการจัดฟันใส เอาไว้สื่อสารกับคุณหมอ
งานจัดฟันใส เป็นอีกการรักษาทางทันตกรรมจัดฟัน ที่ได้รับความนิยมในปัจจุบัน เนื่องจากสามารถทำได้ง่าย ลดการบาดเจ็บจากการใช้แบ็คเก็ตติดที่ฟัน ลดความเจ็บปวดในการดึงฟัน ทำความสะอาดฟันได้ง่าย ช่วยลดปัญหาโรคปริทันต์ในระหว่างการจัดฟัน ซึ่งเป็นปัญหาหลักของการจัดฟันในช่วงวัยผู้ใหญ่ ใช้ระยะเวลาการรักษาไม่นาน เมื่อเปรียบเทียบกับการรักษาด้วยแบ็คเก็ต
บทความนี้เราจะแนะนำให้ท่านได้เข้าใจเกี่ยวกับขั้นตอนการรักษา คำศัพท์ที่ทันตแพทย์มักใช้สื่อสารกับคนไข้ รวมไปถึงข้อจำกัดของการจัดฟันใส (เป็นความคิดเห็นส่วนตัว)
เริ่มจาก จัดฟันใส เหมาะกับลักษณะเคสแบบไหน แน่นอนครับว่าปัจจุบันทฤษฎีและเทคนิคที่ใช้ในการเคลื่อนฟันของงานจัดฟันใส ได้รับการพัฒนาไปอย่างมาก สามารถแก้ไขเคสยากๆได้ในหลายกรณี แต่การจัดฟันใสมีข้อควรระวังและ Errors ที่เกิดขึ้นได้ในหลายขั้นตอน จากการออกแบบการเคลื่อนฟันผ่านคอมพิวเตอร์ ซึ่งความสำเร็จของการจัดฟันใส มักขึ้นอยู่กับหลายประเด็น โดยเฉพาะความร่วมมือในการใส่ใช้งานของคนไข้ เนื่องจากชิ้นงานสามารถถอดออกได้ง่ายด้วยตัวของคนไข้เอง นอกจากนี้การวางชิ้นงานคลุมด้านสบฟัน ทำให้การเช็คการสบฟันในระหว่างการจัดฟันทำได้ยากกว่าการจัดฟันด้วยระบบแบ็คเก็ต ซึ่งติดแน่นกับฟันในช่องปาก และคุณหมอสามารถเช็คการสบฟันในแต่ละครั้งที่คนไข้มาปรับอุปกรณ์นั่นเอง ดังจะเห็นปัญหาจากการรายงานของทันตแพทย์หลายท่าน มักพบการสบฟันกรามที่ไม่สนิท ภายหลังการจัดฟันเสร็จสิ้น นำไปสู่ปัญหาเรื่องการเคี้ยวอาหาร และปัญหาการปวดข้อต่อขากรรไกรในเวลาต่อมาได้
ดังนั้น เคสที่มีความเหมาะสม (ในความคิดเห็นของคุณหมอ) เคสที่มีปัญหารุนแรงในระดับเล็กน้อยถึงปานกลาง เช่น มีช่องห่างขนาดเล็ก ฟันบิดเกที่ไม่ซับซ้อนมาก เป็นต้น ส่วนในเคสที่มีความผิดปกติของขากรรไกรและฟันอย่างมาก อาจจะต้องมีการรักษาทางทันตกรรมจัดฟันประเภทอื่นร่วมด้วย
ขั้นตอนในการจัดฟันใส ก็จะมีขั้นตอนในการเตรียมตัวก่อนเข้ารับการจัดฟัน ที่คล้ายกับการจัดฟันทั่วไป ได้แก่ การตรวจประเมินและวางแผนการรักษา การพิมพ์ปากหรือสแกนช่องปากแบบ 3 มิติ ถ่ายภายภายในช่องปาก การเอ็กซ์เรย์คอมพิวเตอร์ ส่งประเมินชิ้นงานและออกแบบแผนการรักษาผ่านโปรแกรมคอมพิวเตอร์ โดยเป็นการออกแบบแผนการรักษาตั้งแต่ visit แรก จนกระทั่งสิ้นสุดการรักษา เมื่อการออกแบบแผนการรักษาเสร็จสิ้น คุณหมอจะนัดคนไข้กลับมาคุยแผนการรักษา ชมคลิปรีวิวแผนการรักษาในแต่ละ Visit แจ้งจำนวนชิ้นงานที่คนไข้ต้องใส่ และเข้าสู่ขั้นตอนการเตรียมช่องปากต่อไป
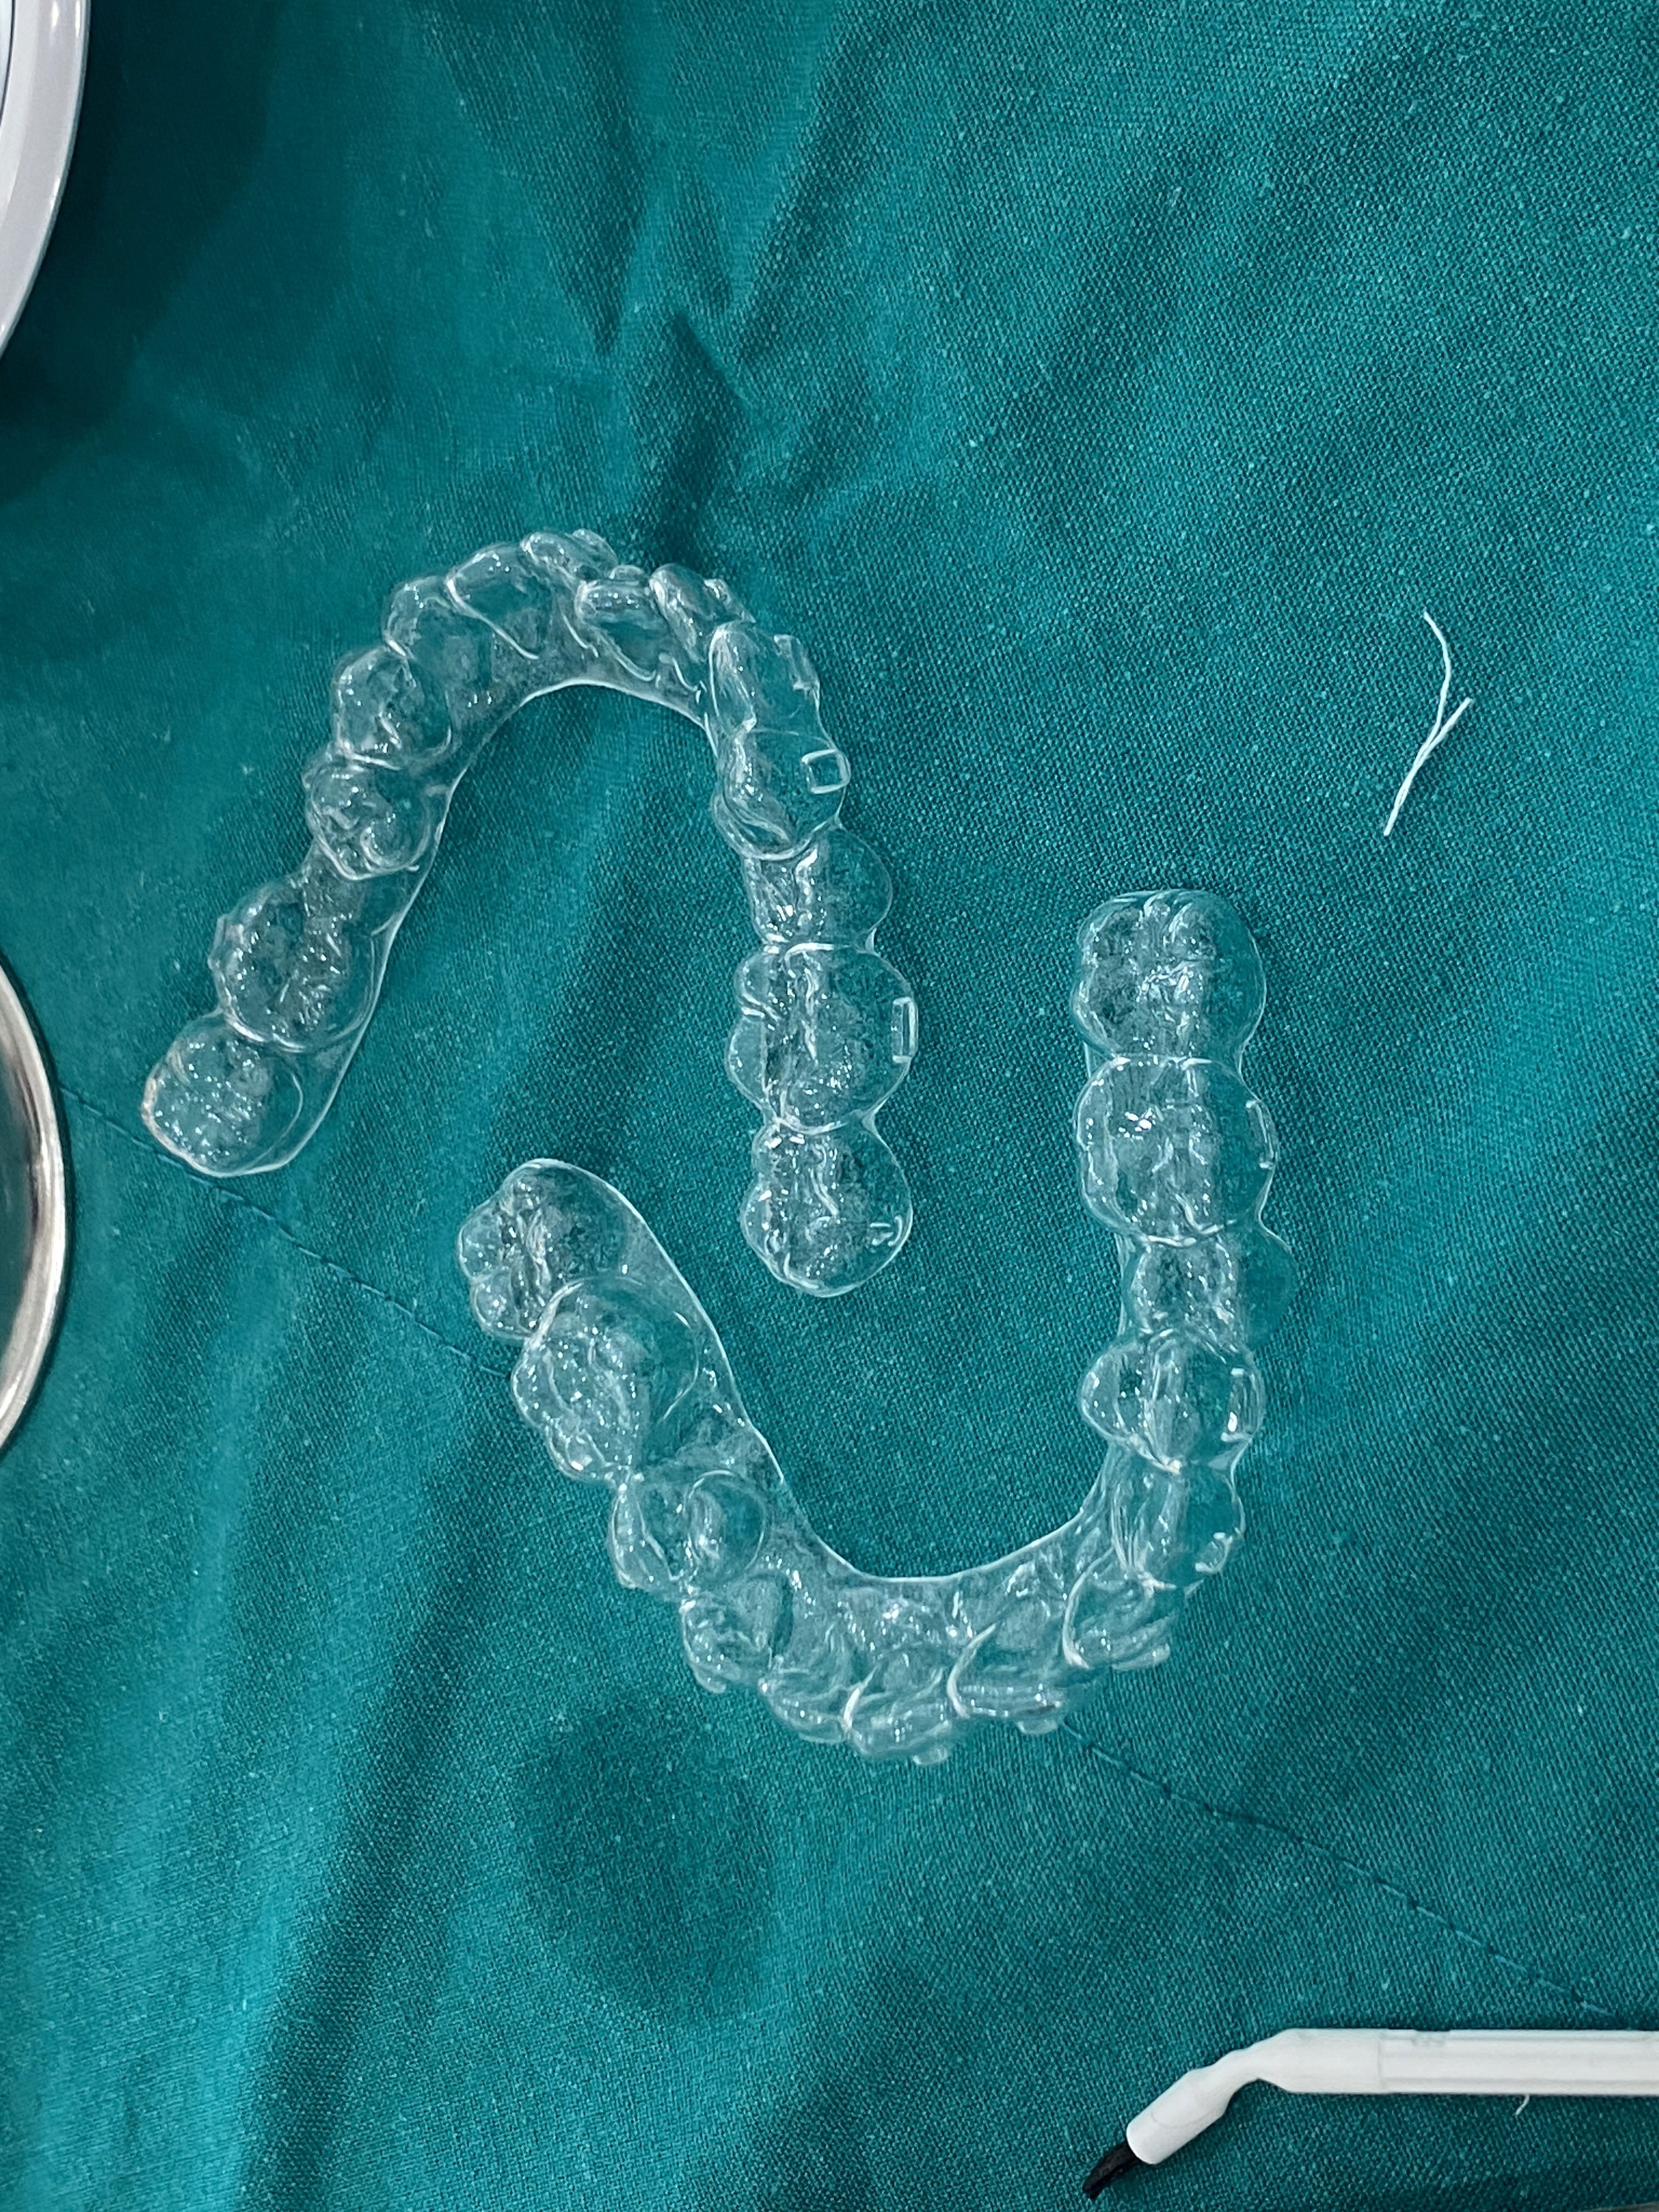
ในชั้นตอนการเตรียมช่องปาก ก่อนการใส่ชิ้นงาน คุณหมอจะเช็คแผนการรักษาที่กำหนดให้ทำการอุด Attachment และการกรอแต่งซี่ฟัน หรือการทำ IPR
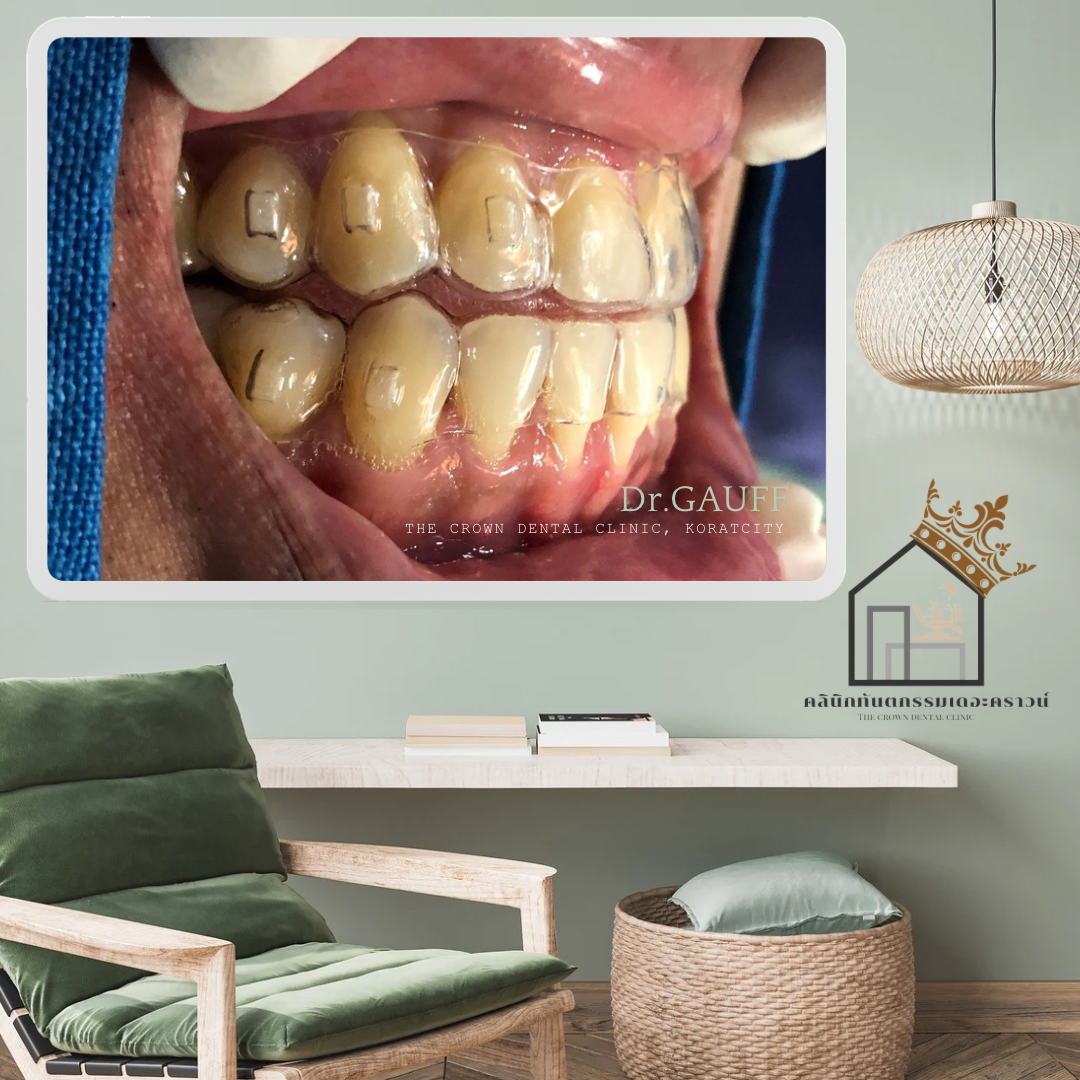
การอุด Attachment - จากภาพ ท่านจะเห็นปุ่มบนตัวฟันเป็นรูปสี่เหลี่ยมในแนวตั้ง หรือแนวนอน ซึ่งเป็นส่วนที่ช่วยในการเคลื่อนที่ของฟัน โดยสร้างขึ้นมาจากวัสดุอุดฟันคอมพอสิตนั่นเอง โดยมีตัว Template ช่วยในการทำ
การทำ IPR - หรือ Interproximal Reduction บางทีคุณหมอจะเรียกกันติดปากว่า การ Strip ฟัน ก็คือการใช้หัวกรอ กรอแต่งซอกฟันให้มีช่องตามที่แผนการรักษากำหนดมา เพื่อเปิดพื้นที่ให้ฟันเคลื่อนได้
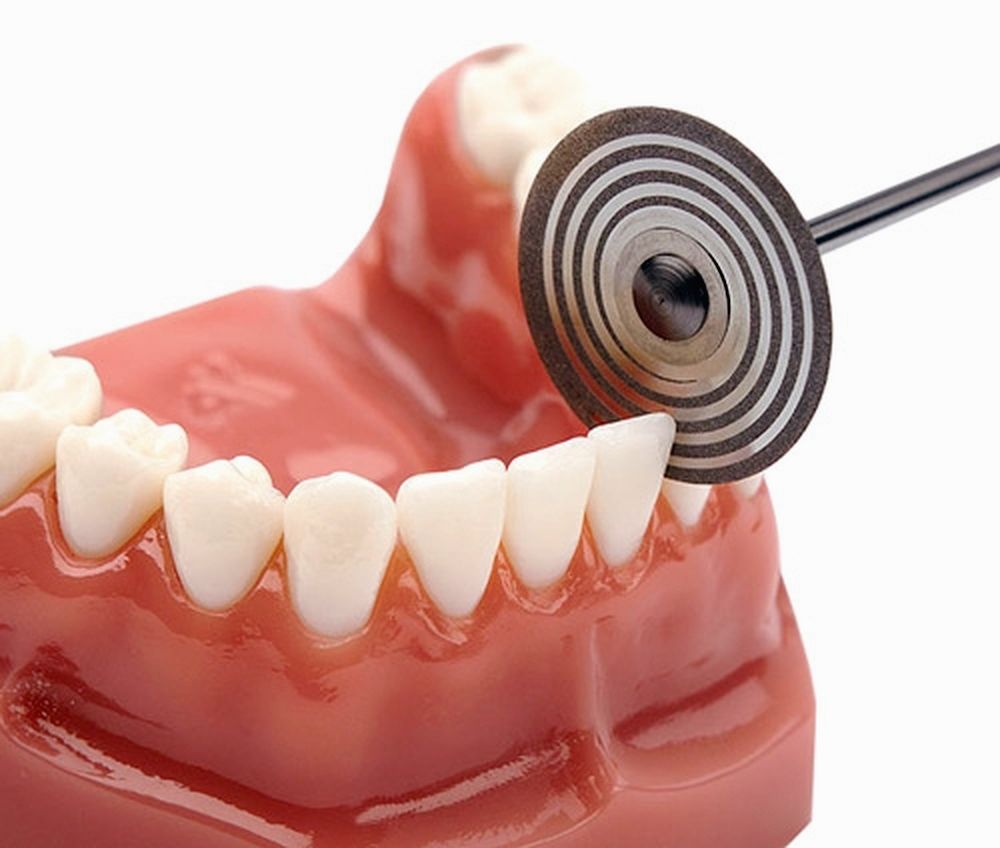
เครดิต : https://www.odontovida.com/2020/10/orthodontics-what-is-interproximal.html#google_vignette
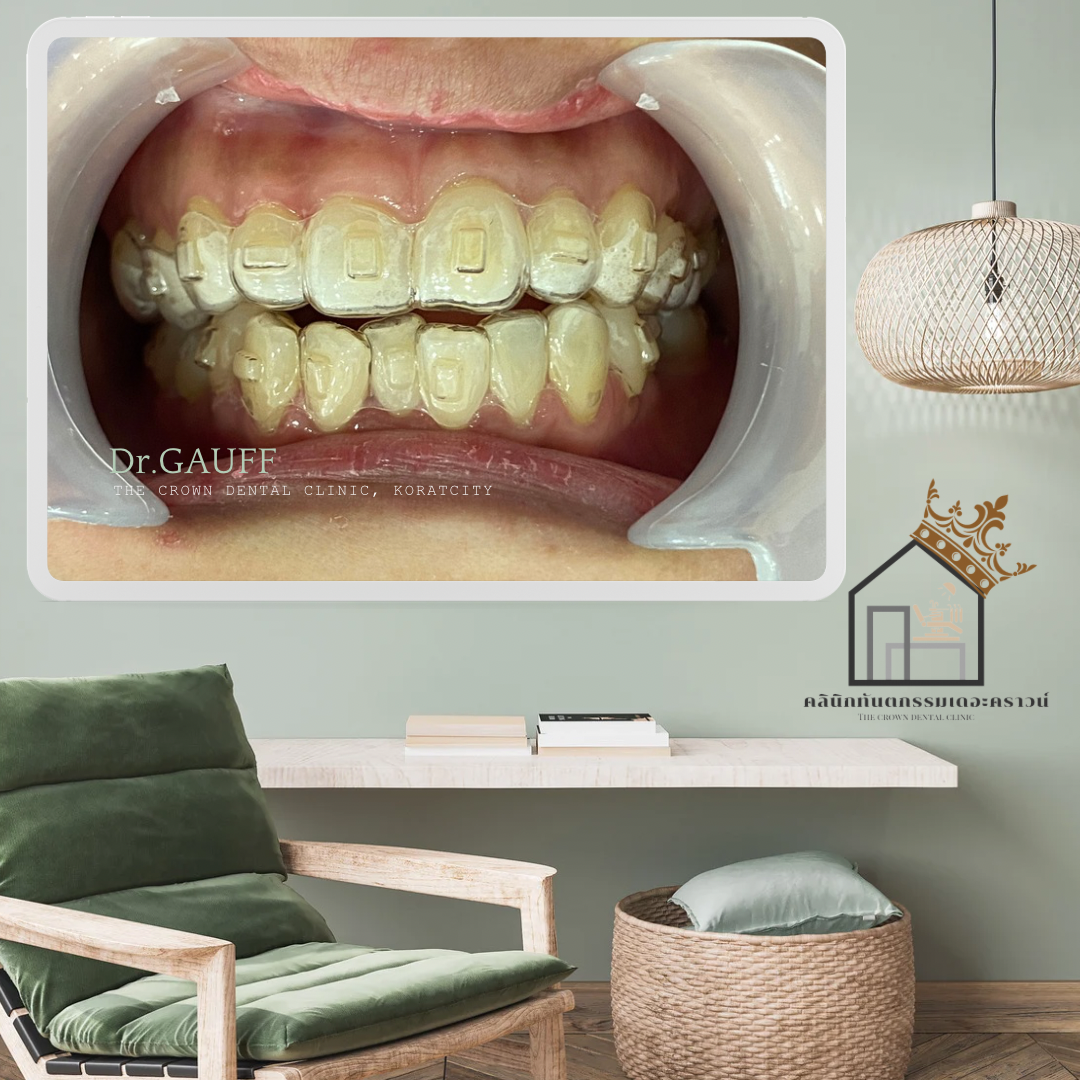
เมื่อทำการอุดปุ่มบนตัวฟัน Attachment และกรอแต่งฟันเรียบร้อย คุณหมอจะทำการ Snap ตัวชิ้นงานชุดที่ 1 เข้าสู่ตำแหน่ง เช็คความฟิตของชิ้นงาน ให้คำแนะนำเรื่องการใส่ชิ้นงานอย่างต่อเนื่อง ยกเว้นตอนถอดรับประทานอาหารและการแปรงฟัน การเปลี่ยนชิ้นงานชุดใหม่เมื่อใส่ไปแล้ว 10-14 วัน เทคนิคการใส่และถอดชิ้นงาน เพื่อลดการแตกหักเสียหายของชิ้นงานและวัสดุที่อุดปุ่มฟัน และการปฏิบัติตัวเมื่อเกิดกรณีที่มีการแตกหักเสียหายของชิ้นงานหรือปุ่มตัวฟัน เป็นต้น
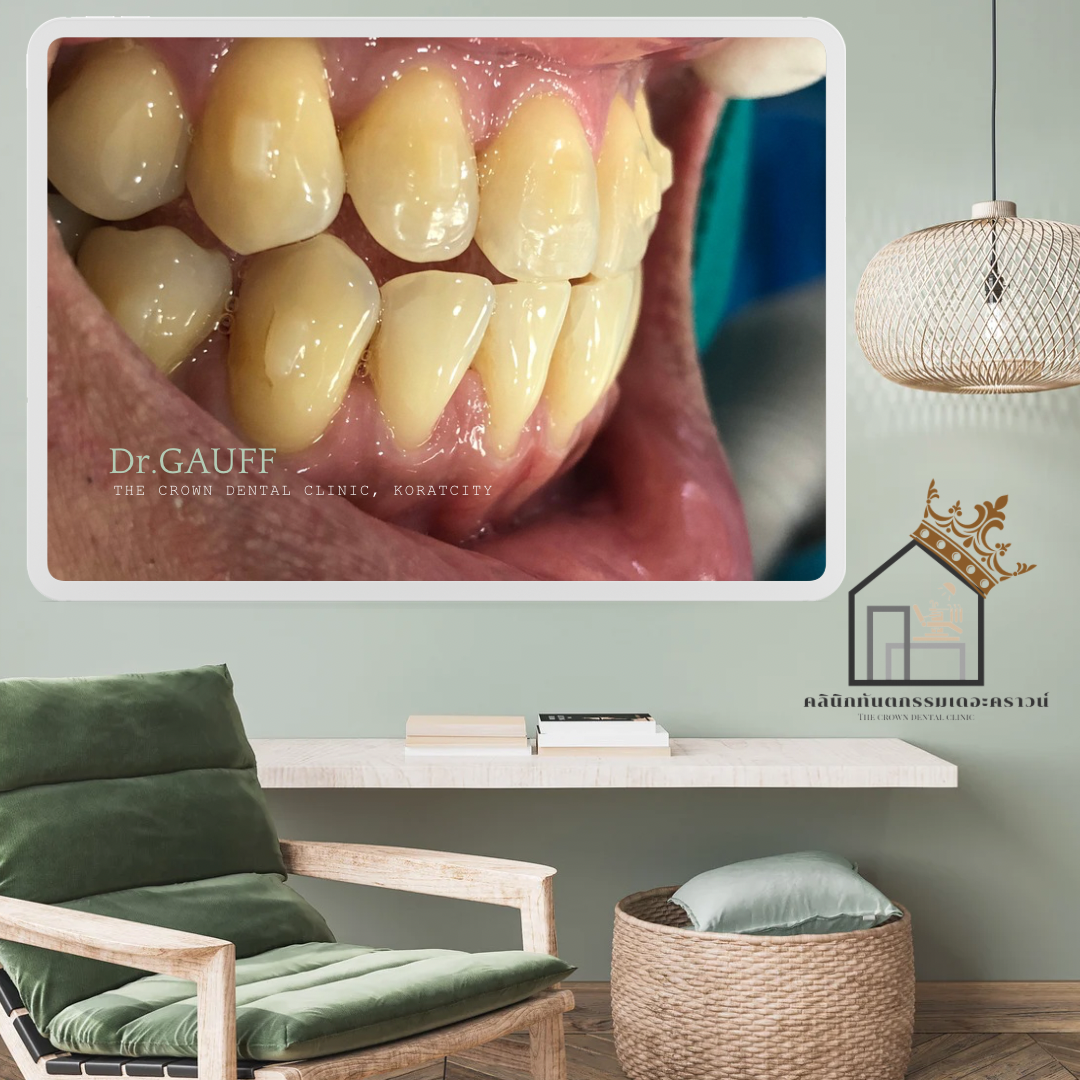
คุณหมอจะนัดกลับมาตรวจเช็คสภาพฟัน การสบฟัน ตรวจดูการดูแลความสะอาด เป็นระยะ จนกว่าจะใส่ชิ้นงานสุดท้าย ในกรณีที่ใส่ชิ้นงานสุดท้ายแต่ยังพบการเรียงตัวของฟันที่ยังไม่เหมาะสมตามแผน สามารถที่จะทำการ Refinement งานได้ ซึ่งคือขั้นตอนการตามเก็บงานที่ไม่เรียบร้อย การแก้ไขการสบฟัน สร้างชิ้นงานใหม่เพิ่มเติม เพื่อแก้ไข Errors ต่างที่เกิดขึ้นให้เรียบร้อย จากนั้นจึงพิจารณาทำเครื่องมือคงสภาพฟัน หรือ Retainers ต่อไป
Clear Aligner Orthodontic Treatment
Clear aligner orthodontics is another orthodontic treatment option that has become increasingly popular today. It is favored because it is easy to use, reduces soft-tissue injury compared with fixed brackets, causes less discomfort during tooth movement, and allows easier oral hygiene. This helps reduce the risk of periodontal disease during treatment, which is a major concern in adult orthodontic patients. In many cases, treatment time is also shorter compared with conventional bracket systems.This article aims to help readers understand the treatment process, the terminology commonly used by dentists, and the limitations of clear aligner treatment (based on the dentist’s personal opinion).
What Types of Cases Are Suitable for Clear Aligners?
It is undeniable that modern theories and techniques for tooth movement with clear aligners have advanced significantly, allowing correction of many complex cases. However, clear aligner treatment still has certain limitations and potential errors, particularly during the digital planning phase, where tooth movement is designed using computer software.The success of clear aligner treatment depends on several factors, most importantly patient compliance, since the appliances can be easily removed by the patient. In addition, because aligners cover the occlusal surfaces of the teeth, it is more difficult to assess occlusion during treatment compared with fixed bracket systems, which are bonded to the teeth and allow the dentist to check occlusion at every adjustment visit.As reported by many dentists, a common issue after completion of clear aligner treatment is posterior open bite or incomplete molar contact, which can later lead to chewing difficulties and temporomandibular joint (TMJ) discomfort.Therefore, in the dentist’s opinion, clear aligners are most suitable for mild to moderate cases, such as:
- Small spacing
- Mild to moderate crowding without complex skeletal discrepancies
Cases with significant jaw or dental abnormalities may require other orthodontic modalities, either alone or in combination.
Clear Aligner Treatment Workflow
The preparatory steps for clear aligner treatment are similar to conventional orthodontics and include:
- Clinical examination and treatment planning
- Dental impressions or 3D intraoral scanning
- Intraoral photographs
- Digital X-rays or CT scans
All data are then used to design a computer-based treatment plan, mapping tooth movement from the first visit until completion of treatment. Once the plan is finalized, the dentist schedules a consultation to:
- Discuss the treatment plan
- Review a simulation video of tooth movement at each stage
- Inform the patient of the total number of aligners required
The patient then proceeds to the oral preparation phase.
Oral Preparation Before Wearing Aligners
Before inserting the aligners, the dentist will follow the approved treatment plan and perform the necessary procedures, which may include attachment placement and interproximal reduction (IPR).Attachment placement
Attachments are small rectangular composite resin buttons bonded to the teeth, either vertically or horizontally, as seen in clinical images. These attachments help guide and control tooth movement. A template is used to position them accurately.IPR (Interproximal Reduction)
IPR, sometimes informally referred to as “tooth stripping,” involves removing a small amount of enamel between teeth using a rotary instrument. This creates space according to the treatment plan, allowing teeth to move into proper alignment.Credit: odontovida.com – Interproximal Reduction in Orthodontics
Aligner Delivery and Follow-Up
After attachments and IPR are completed, the dentist will snap the first set of aligners into place, check the fit, and provide instructions on:
- Wearing the aligners continuously, except during meals and toothbrushing
- Changing to the next set of aligners every 10–14 days
- Proper insertion and removal techniques to prevent damage to the aligners or attachments
- What to do if an aligner or attachment becomes damaged
The dentist will schedule regular follow-up visits to monitor tooth movement, occlusion, and oral hygiene until the final aligner is worn.If, after completing the final aligner, the tooth alignment or occlusion does not fully meet the treatment goals, a refinement phase may be required. Refinement involves additional digital planning and fabrication of new aligners to correct remaining discrepancies and address any errors.Once satisfactory alignment and occlusion are achieved, the final step is fabrication of retainers to maintain the treatment results.
ขอบคุณที่ติดตามอ่านบทความและรีวิวเคส : คุณหมอกอล์ฟ ทีมเดอะคราวน์โคราช